

How To Make A Boxed Makeup Bag
Inside: DIY Zippered Box Pouch Tutorial
Who doesn't dear a Zippered Box Pouch. They have then many practical uses, peculiarly with back-to-school being followed by Christmas sewing.

Earlier writing this tutorial I was looking for a box pouch tutorial because I wanted something small to carry around a few paw sewing supplies. Every tutorial I found had exposed seams in the lining. This was never going to piece of work for me because those seams would eventually fray and have lots of loose threads.
If you've ever fabricated a simple attachment handbag, you know how easy it is to hide the seams; so, I accept taken it upon myself to create a DIY Zippered Box Pouch Tutorial that has hidden seams.
All you need are a few fat quarters and the ability to sew a straight stitch. Remember this post:DIY Pom Pom Napkins with Mitered Corners. I nonetheless had some leftover cloth from the fat quarter package and knew it would be perfect for a making a DIY Zippered Box Pouch.
Materials:

This site contains affiliate links which won't modify your price. As an Amazon Associate we earn from qualifying purchases.
- Several Fat Quarters
- One 14″ Zipper
- Pellon Woven Fusible Interfacing
- Quilting Ruler
- H2o Erasable Marking Pen
- Rotary Cutter
- Cutting Mat
- Clover Wonder Clips
- Matching Thread
- Usual sewing supplies:(sewing machine, atomic number 26, ironing board, scissors, pins, etc.)
Want an advertising-costless, printable copy of this tutorial? Coil to the bottom of this post for more details!
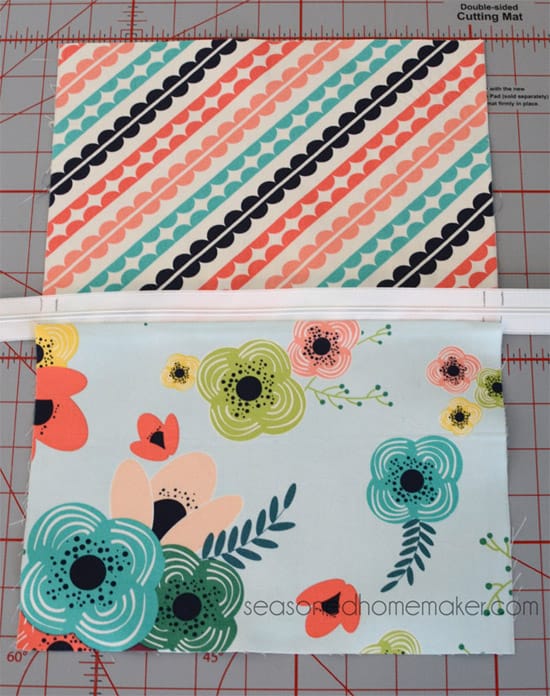
Step one: Set up Fabrics
Nigh fat quarters come folded so printing each fat quarter until there are no creases.

Cut out the post-obit:
- Outer Cloth: 2 pieces x″ x vii 1/2″
- Lining Fabric: 2 pieces " 10″ x 7 1/2″
- Interfacing: 4 pieces 10″ ten 7 i/2″
- Coordinating Fabric for Zipper Pull Tabs: (ane) piece 2 ane/4″ 10 7″

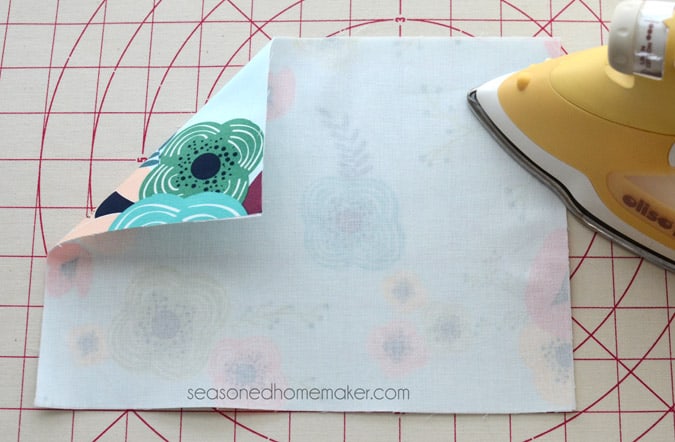
Footstep ii: Add Interfacing
- Follow the directions on the fusible interfacing bundle and fuse the interfacing to the wrong side of each slice of Outer Fabric and Lining Material. Lay the bumpy side onto the wrong side of the fabric and press with a hot atomic number 26 for approximately x seconds.
- The Zipper Pull Tab material does not need interfacing.
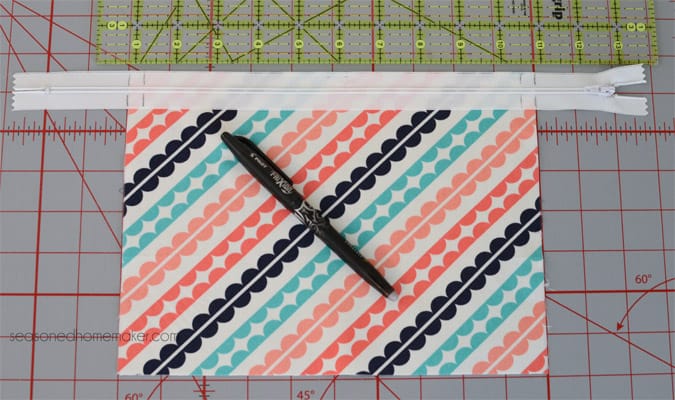
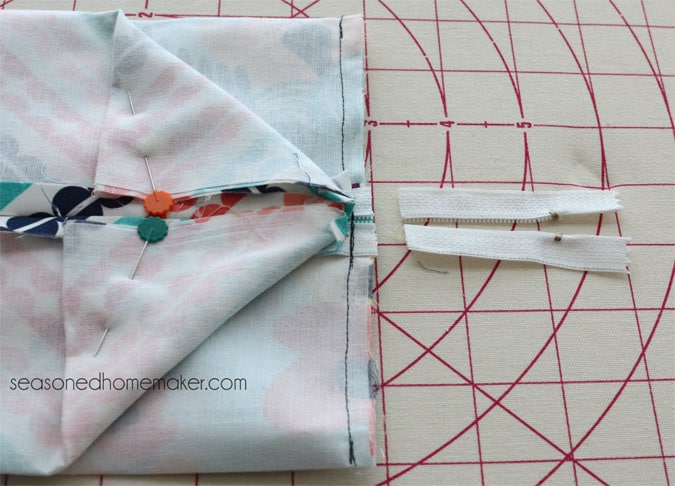
Step 3: Zipper Placement
- The zipper is purposely longer than you will need for this project. Later in the tutorial we will be cutting down the zipper to precisely fit our handbag so feel free to use whatever size zipper as long equally it is at least 14″.
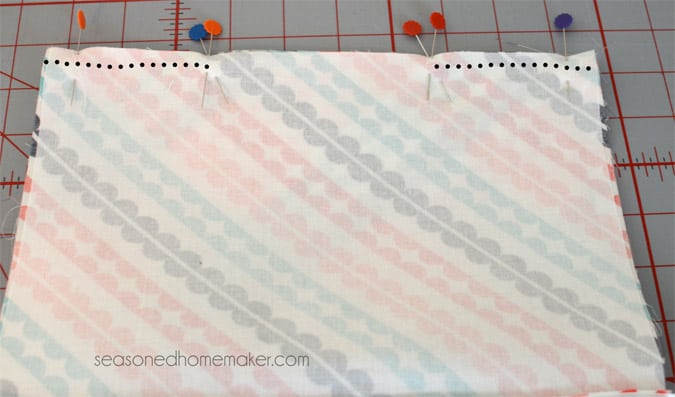
- Lay the attachment right side up on top of the right side of the Lining Material. Information technology should exist placed so information technology equally extends across the fabric. Mark a line where the zipper meets the fabric.
- Marking a second line 3/8″ in from the material's raw edge. You lot do not want to sew across this mark. Yous will need the small-scale amount of infinite that this provides when you're attaching the Zipper Pull Tabs and sewing the handbag side seams.
Step 4: Clip Zipper
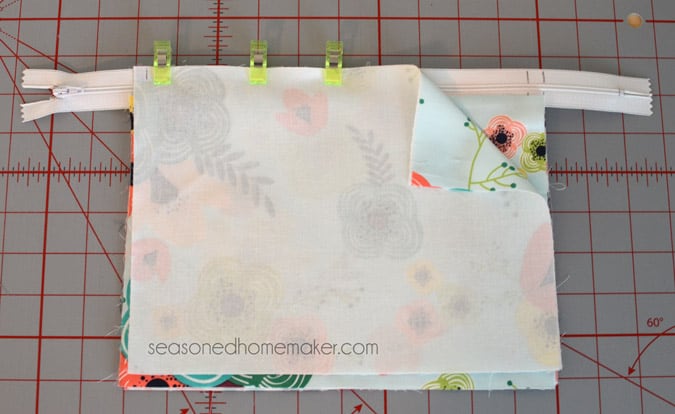
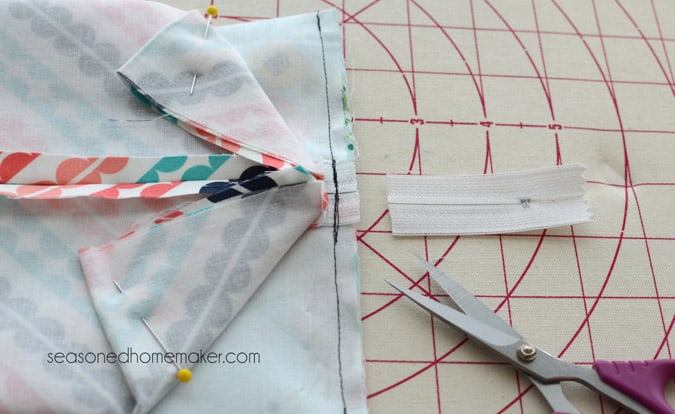
- Identify the Outer Fabric right side downwards over the zipper, lining them up evenly.
- Your fabrics will at present be right sides together with the zipper sandwiched between them. Rather than pinning, I prefer these Clover Wonder Clips because of the zipper's raised edge. Prune the zipper and material together.
- Make a mark three/8″ from each end to remind you where to kickoff and stop.
Step 5: Stitch Zipper
- Put a attachment foot onto your machine. Run up the three layers together starting at the second line 3/viii″ from the fabric's raw edge. It is very important to leave this unstitched for at present.
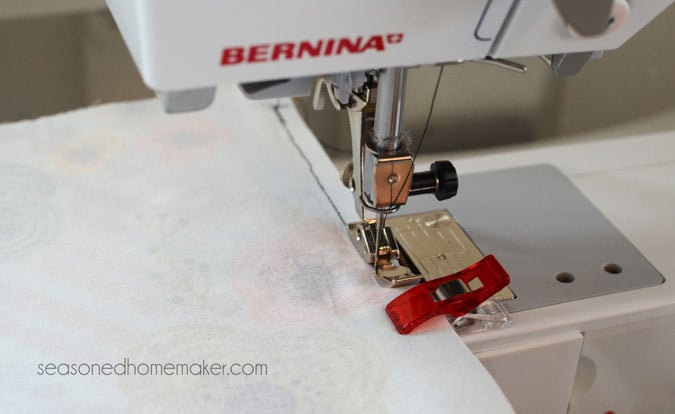
- This is what information technology looks similar with the zipper-side upward.
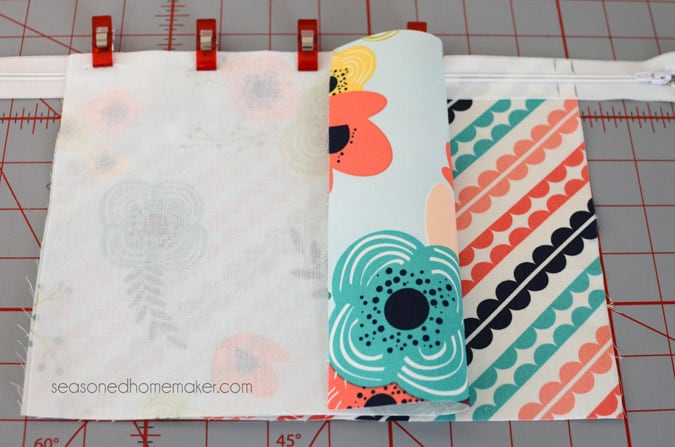
Step half-dozen: Other Side of Zipper
- Now for the other side of the zipper. Lay the other piece of Lining Material flat and place the attachment's edge along the top edge of the fabric. The Lining Fabrics volition now be touching right sides together.
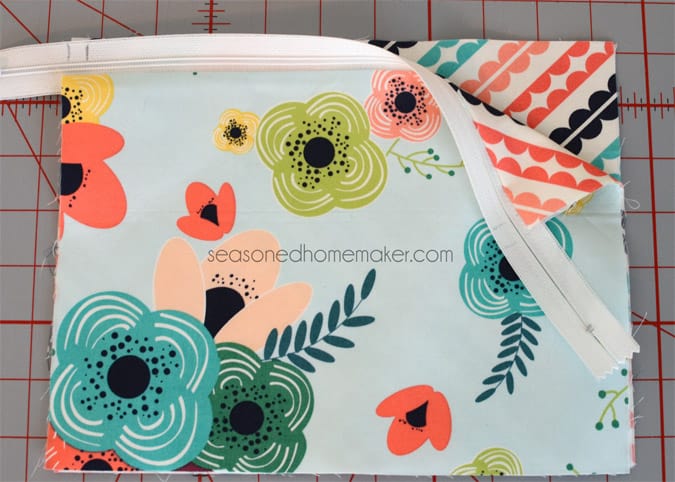
- Place the Outer Fabric on top of the attachment, lining upwards the edges. The Outer Fabrics volition now be touching correct sides together. Clip to hold. Sew together together using a zipper foot.
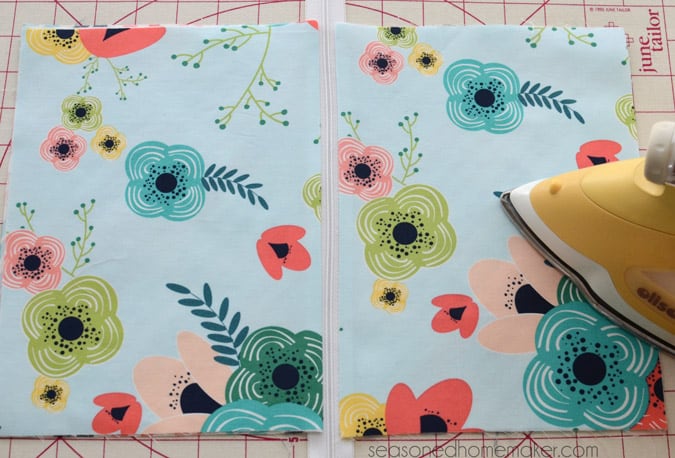
- Press your Outer and Lining seams apartment. Your bag is starting to take shape.
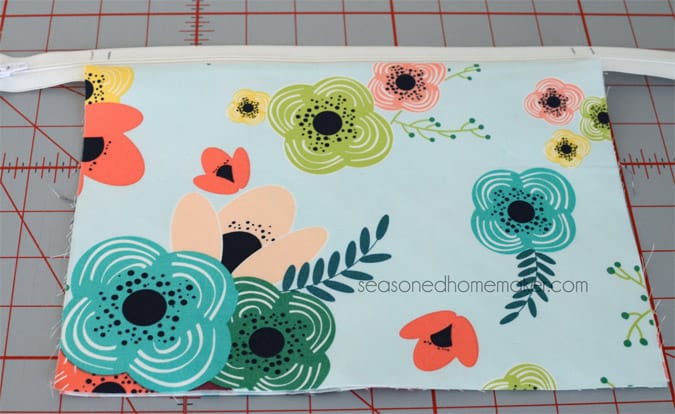
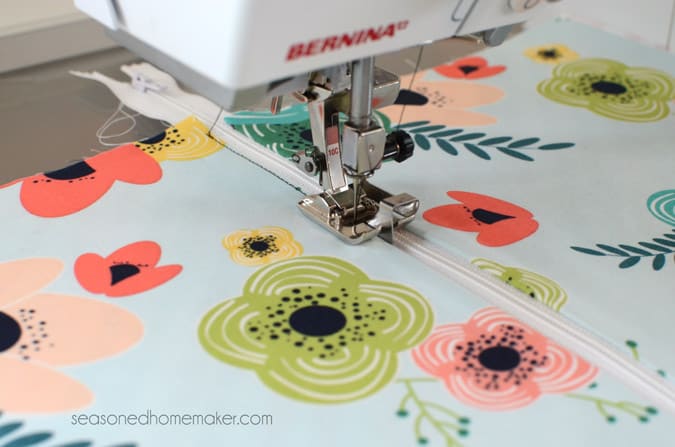
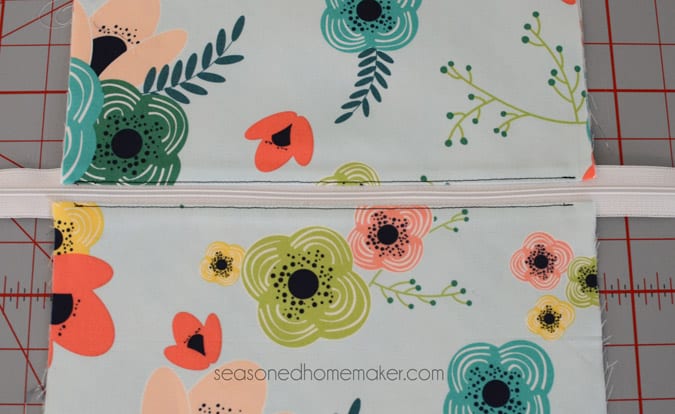
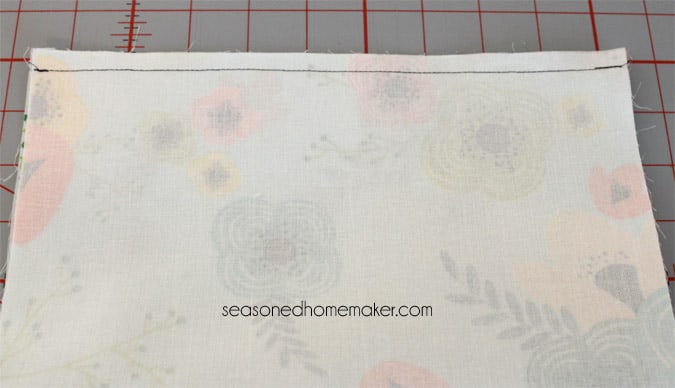
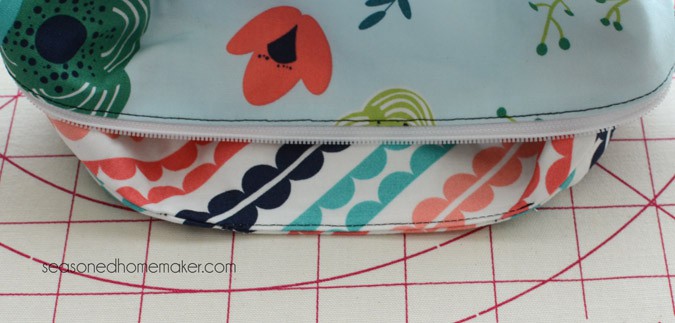
Step 7: Topstitch
- You desire to topstitch side by side to the attachment. This prevents the material from getting caught in the attachment in one case you are using the bag.
- Starting three/8″ from the edge, peak stitch next to the zipper. Repeat on the other side. If yous take an Border Stitch Foot this is an excellent identify to apply it.
Note: I am using a darker thread in order to demonstrate.
Pace 8: Sewing Lining
- On the stop opposite the zipper, pin the Lining pieces correct sides together. Be sure to exit a three-4″ opening for turning. One trick I utilize is to put double pins at the two terminate points.
- Employ a 3/eight″ seam allowance.
- Starting at i end, stitch until you attain the double pins, dorsum stitch.
- Starting at the next gear up of double pins, back sew together, and so stitch to the other end.
- When you turn your bag these stitches have a tendency to pop open if they aren't back stitched.
Step 9: Stitch Outer Textile
- Pin the Outer fabric pieces correct sides together. Using a three/8″ seam allowance sew together from one cease to the other. (Information technology isn't necessary to leave an opening.)
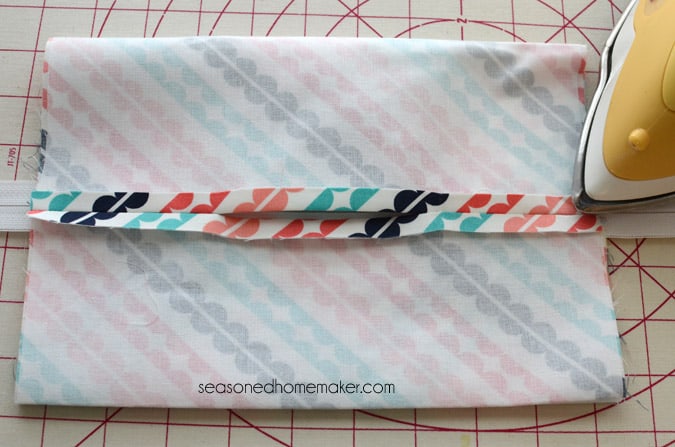
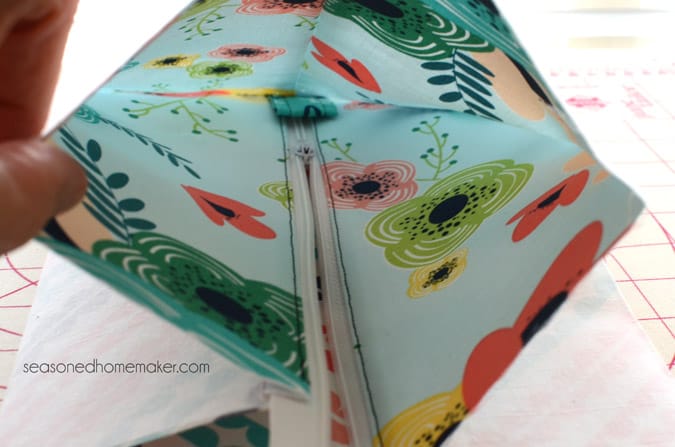
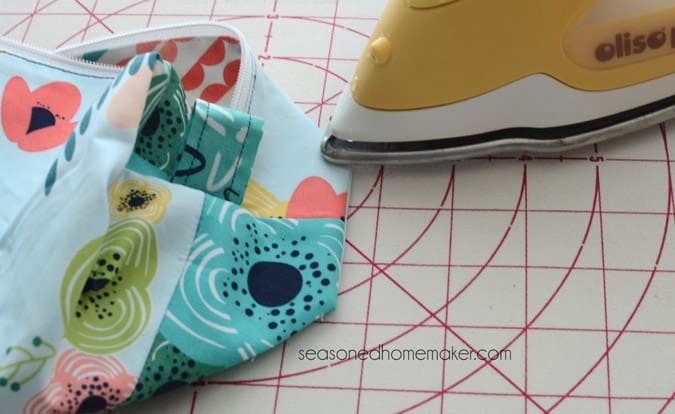
Step ten: Press Open
- Refold your bag then the seams and the zipper teeth align. Printing open the seams on one side, flip over and printing open the seams on the other side.
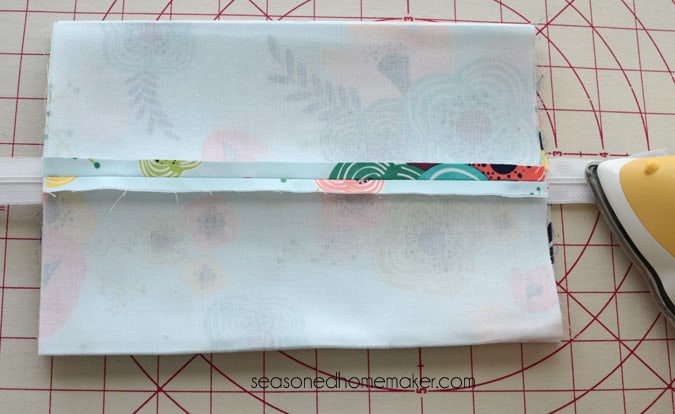
- Don't forget about the opening on the Lining Fabric. Be sure to line up these seams when pressing.
- Set the bag aside.
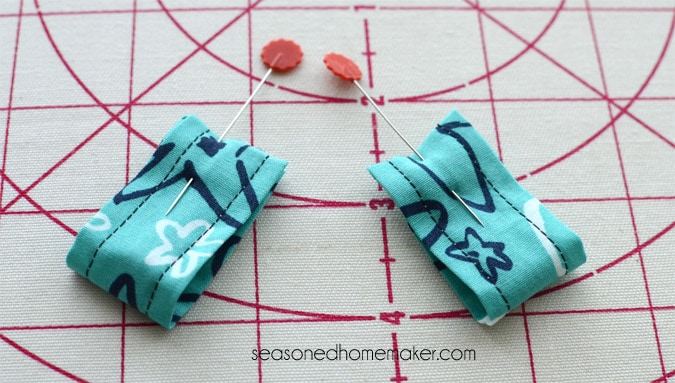
Step 11: Brand Tabs
- Time to make the tabs. Take your piece of two 1/4″ ten 7″ tab fabric and fold right sides together. Using a 1/4″ seam allowance run up down the long edge.
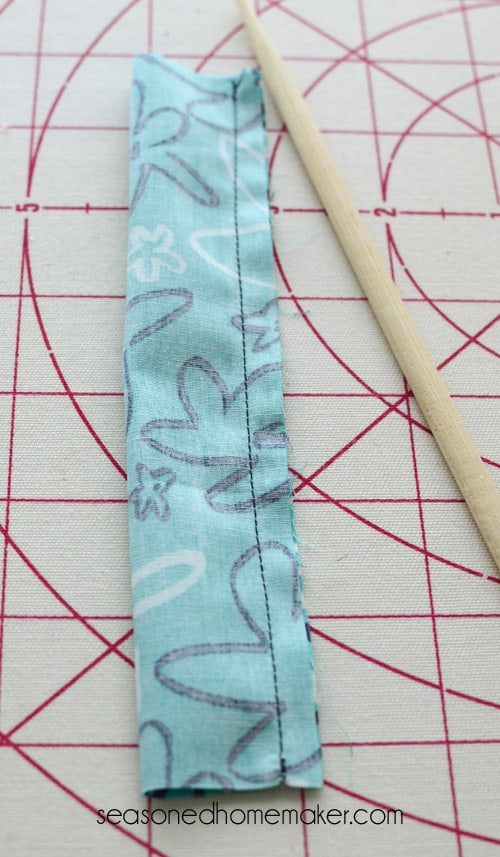
- Using either a turning tool, condom pin, or chopstick, plow the tab right side out. Printing with the seam in the center.
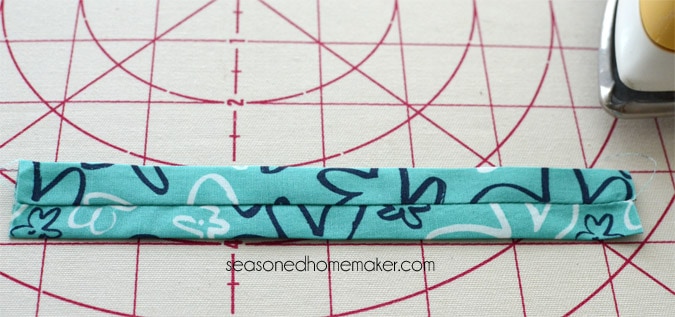
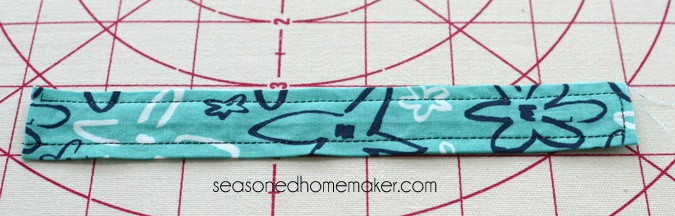
- Topstitch on both outer edges.
- Fold in one-half lengthwise and cut in half. You lot volition at present take two tabs that are approximately ii″ x 3 ane/2″.
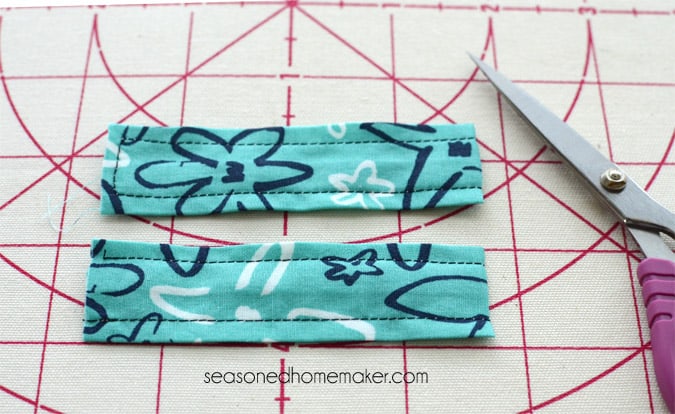
- Take each of the tab halves and fold them in one-half with the seam sides facing each other. Pin to agree.
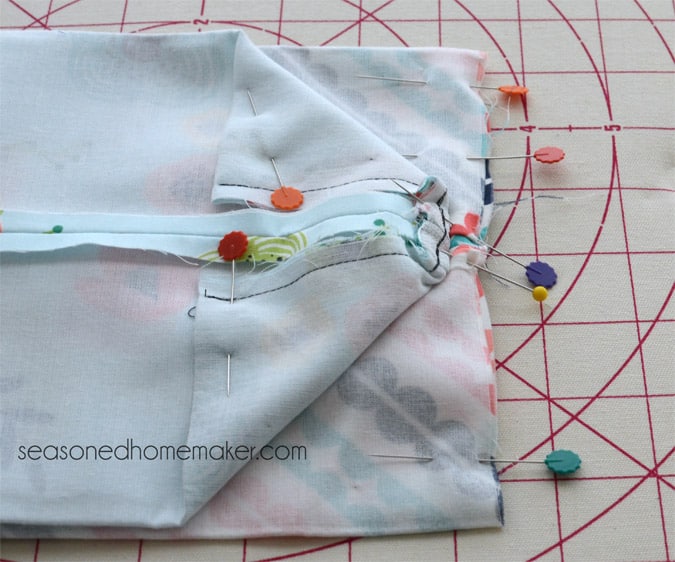
Step 12: Side Seams
- It is very, very, very, very of import that you follow these next steps in exact order. If you don't y'all will not be able to turn your handbag right side out.
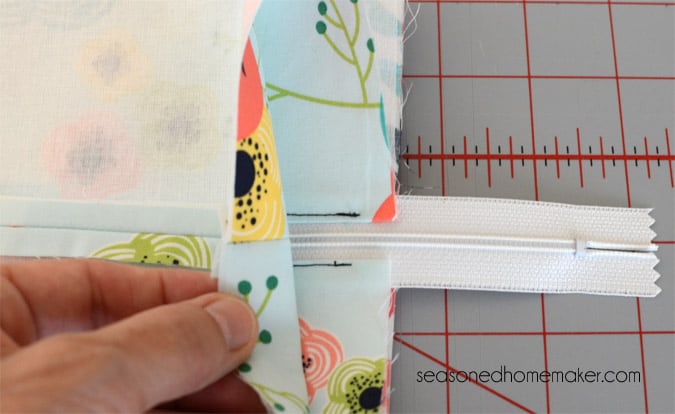
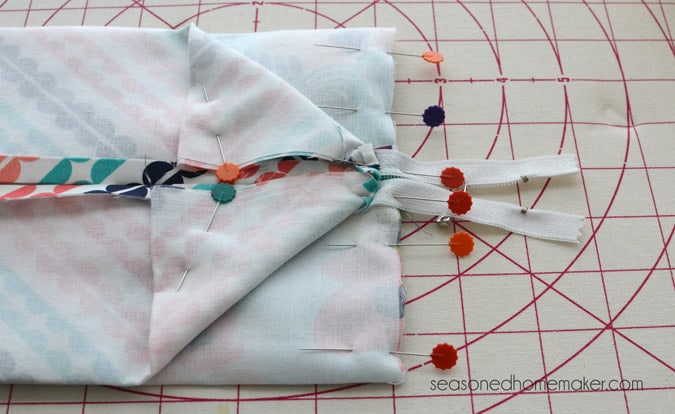
- For this step you will only be working with the Outer fabric. On the side of the bag with the zipper stop, open upwards the end of the cloth. Insert one of the tabs in betwixt the right sides of the fabric matching it to the raw edges. Pin in place.

- With right sides together, pin the Outer fabric together. It is important to brand sure the Lining Fabric does not interfere with this stride. I like to pin mine back and out of the way so I don't accidentally sew it into this seam.
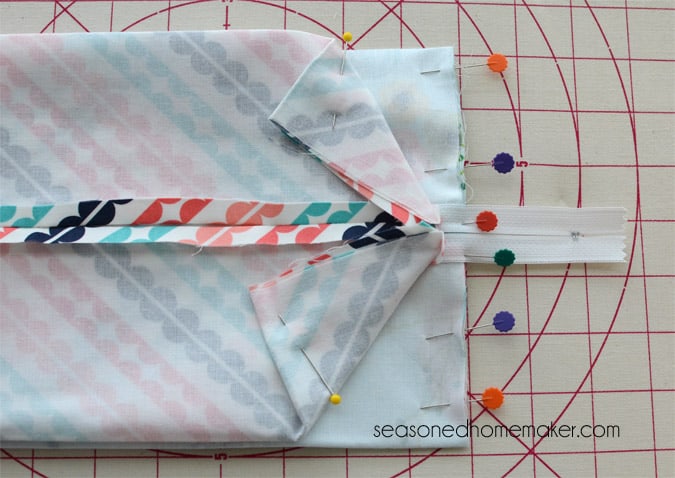
- You may want to use a zipper foot for this seam. Run up together using a i/iv″ seam allowance. Become slowly over the zipper teeth. For extra security you may desire to dorsum stitch over the attachment.
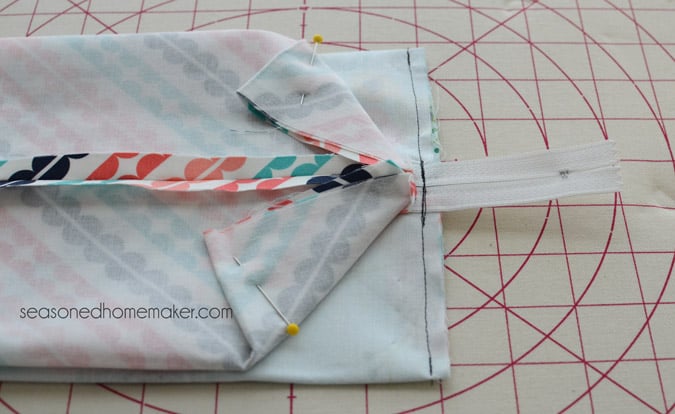
- Trim away the excess attachment.
Step 13: Open Attachment
- Open up THE ZIPPER at least 2/3'southward of the manner across. If y'all don't open up the zipper, you lot will non exist able to plow your bag. Open the zipper. Open the zipper. Open the zipper.
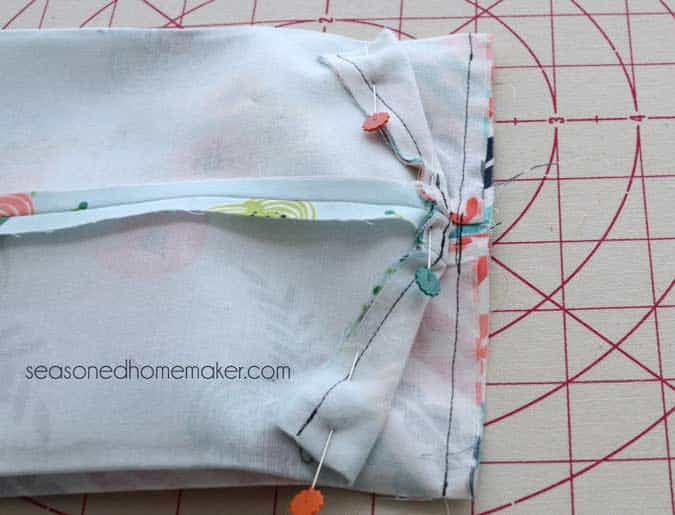
Step 14: Sew Other Side
- Echo Step 11 on the opposite side. You lot will need to accept a few boosted precautions because your zipper is now open up. I similar to use a safety pivot to concur my attachment together. I also use pins to brand sure the zipper doesn't move when I'grand sewing it down.
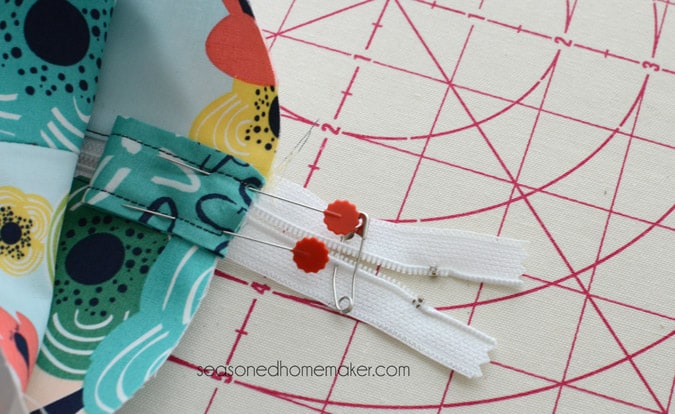
- Insert the Zipper Pull in the same manner as Stride xi. Pivot in place. Be sure the now-open zipper is correctly lined up and then stitch downwardly. It is a adept idea to backstitch when you lot sew over the zipper, just like you lot did in Step xi.
- Trim away the excess zipper at the seam allowance.
Pace 15: Run up Lining
- We will at present sew the Lining Fabric together in a similar manner. With right sides together, pivot the Lining in place. Using a one/4″ seam allowance, sew the lining fabric together.
- Repeat this exactly on the reverse end of the bag.
- At this signal you lot may want to trim downwards all of your finish seam allowances down to 1/4″. This volition make it easier to create the boxed ends on your purse. If you make up one's mind to do this, be conscientious when cutting over the zipper teeth.
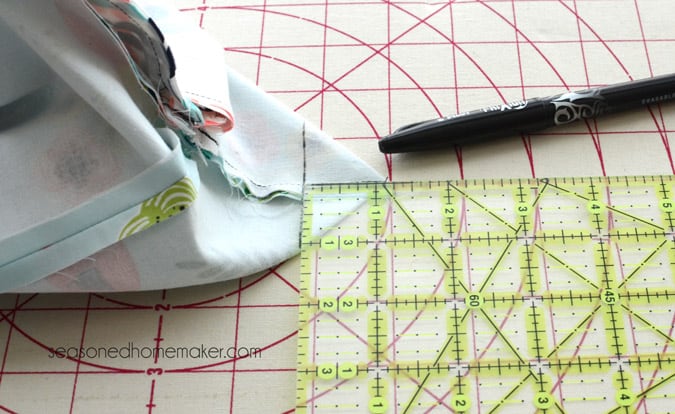
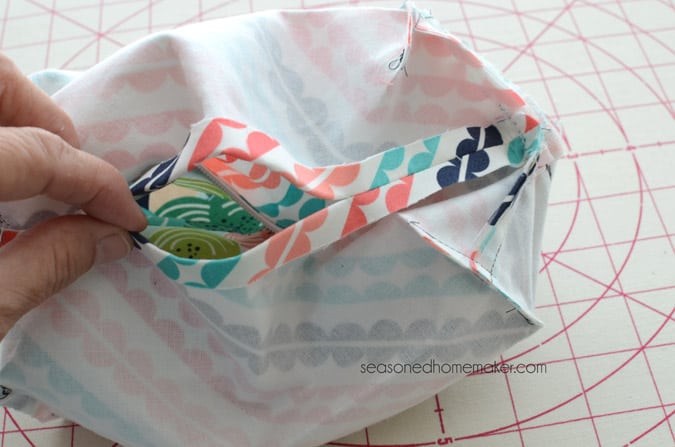
Pace 16: Making Corners
- Creating the boxed ends is easier than you recall. Starting with ane corner of the Outer Fabric, fold the bottom corner of your bag and then it creates a triangle in the corner. Match upwardly the seam with he crease on the contrary side and it will line upwardly perfectly.
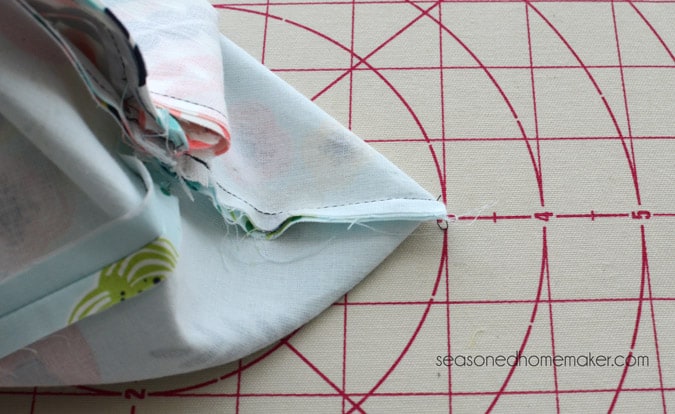
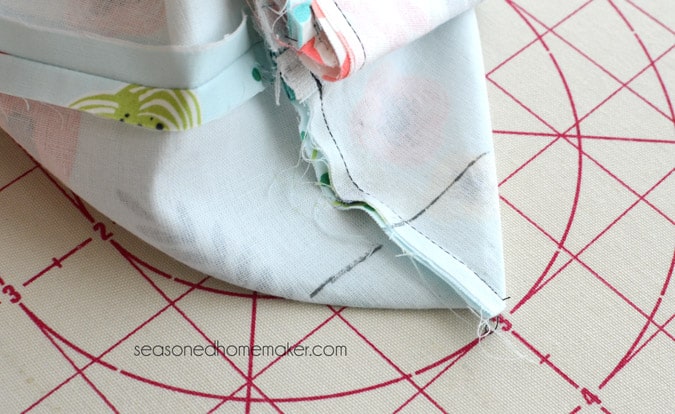
- Pin the corner and with your water erasable pen make a mark ane ane/4" in from the corner.
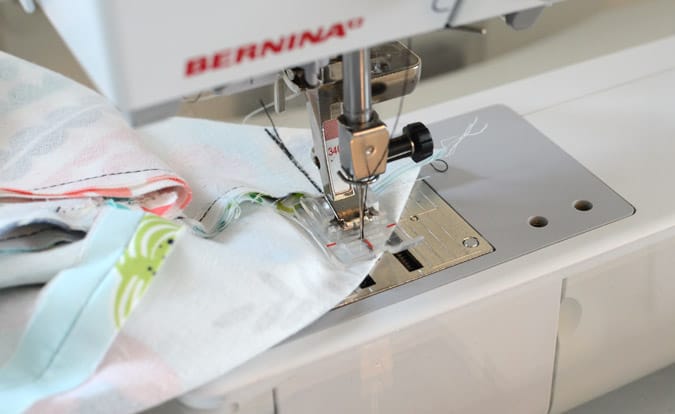
- Draw a stitching line and and so sew together across to create a pleat.
- Prune away the triangle, leaving a 1/iv" seam allowance. Be sure to remove the markings with an fe.
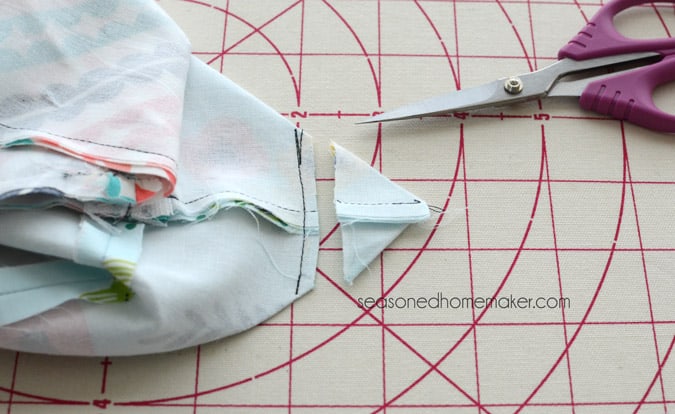
- Repeat on the other vii corners of the purse. Discover how dainty and boxy the pocketbook is!
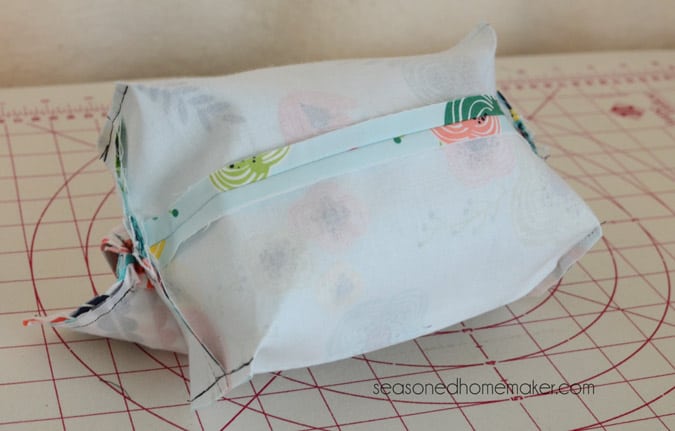
Pace 17: Turning the Bag
Time to give birth to your pocketbook.
- Retrieve the opening we left in Step 7. Achieve your hand into this opening and pull the fabric right side out.
- Push the Lining Fabric back inside the bag. Using something pointy (like a chopstick), poke out all viii corners of the purse. This will requite information technology a overnice boxy shape. Press the boxy ends.
- You lot volition need to sew together closed the opening used for turning. Y'all tin can practise this either by hand or by machine. Personally, I prefer the machine because I don't want whatever gamble of it coming undone and something getting betwixt the Outer cloth and the Lining.
Step 18: Finishing Purse
- Carefully, iron out whatever creases so your handbag looks amazing. Yous may need to use something like a sleeve board to properly press the bag.
- The finished size of this bag is 7″ W x four″ D x 3″ H. For a larger purse, adjust the starting measurements.
And you lot are done!
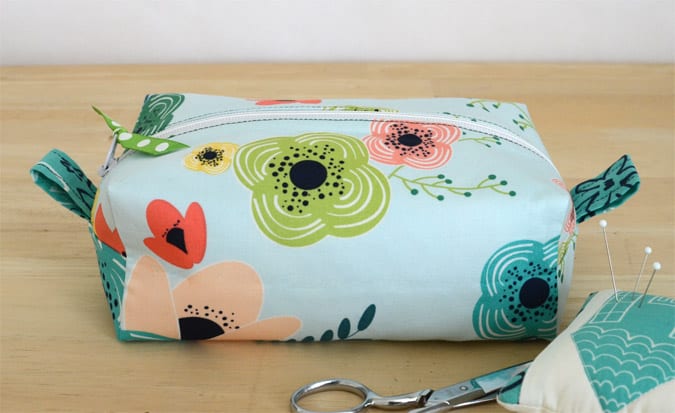
Now fill the bag with whatever you desire. I'm using mine for manus sewing supplies. I program to brand several more that I will use when I have a sewing class. That way I tin carve up out supplies like threads, bobbins, etc.
This purse is actually super easy to brand. The kickoff one may be a challenge, but after that y'all should be able to whip them out in no time at all.
>>> Desire a printable version of the mail service? Click the pink button to get the Printable PDF instructions.

Here'due south a brusk video showing the steps.

How To Make A Boxed Makeup Bag,
Source: https://www.seasonedhomemaker.com/diy-zippered-box-pouch-tutorial/
Posted by: claypoolecontings.blogspot.com
0 Response to "How To Make A Boxed Makeup Bag"
Post a Comment